Introduction: Small Holes... Big Problem?
A small hole in drywall might seem like a trivial problem, but it can become an eyesore and lead to bigger issues if left unaddressed. Fortunately, repairing these holes is relatively simple and can be done yourself, saving you money and giving you a sense of accomplishment. In this article, we'll walk you through how to fix a small hole in drywall, step-by-step, considering the necessary tools and materials, different techniques, and how to achieve a professional-looking result.
Chapter 1: Identifying the Type of Hole and Assessing the Damage
Before starting any repair process, it's essential to identify the type of hole and the extent of the damage. Is it a tiny hole from a nail or tack? Or is it slightly larger due to something bumping into the wall? Assessing the size and depth of the hole will help you choose the appropriate method and materials for the repair.
- Very Small Holes (Less than 1/4 inch): Often caused by nails or tacks.
- Small Holes (1/4 inch to 1/2 inch): May be caused by small screws or a light impact.
- Medium Holes (1/2 inch to 2 inches): Often caused by doorknobs or furniture.
- Large Holes (More than 2 inches): Require a more complex repair and may need a new piece of drywall.
Chapter 2: Tools and Materials Needed
To repair a small hole in drywall, you will need the following tools and materials:
- Spackle or Drywall Joint Compound: The main material for filling the hole.
- Putty Knife: For applying and smoothing the spackle. It's best to have a small and a larger putty knife.
- Sandpaper: To smooth the surface of the spackle after it dries. Use medium-grit sandpaper (120-150) and then fine-grit sandpaper (220).
- Damp Sponge or Cloth: To clean dust and dirt from the wall.
- Dust Mask: To protect your respiratory system during sanding.
- Safety Glasses: To protect your eyes from dust.
- Primer: To prepare the surface before painting (optional).
- Paint Matching the Wall Color: To completely conceal the repair.
- Small Paint Brush or Small Paint Roller: To apply the paint.
Chapter 3: Steps to Repairing a Small Hole
- Clean the Area: Use a damp sponge or cloth to clean the area around the hole. Make sure to remove any dust, dirt, or loose paint flakes.
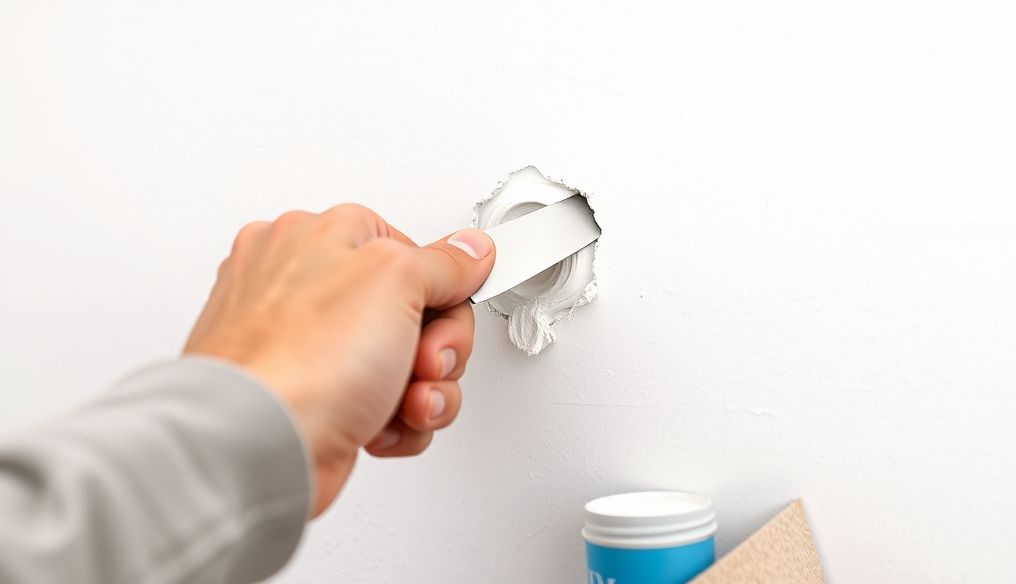
- Apply Spackle: Using a putty knife, apply a small amount of spackle to the hole. Gently press the spackle to fill the hole completely.
- Smooth the Spackle: Use the putty knife to smooth the surface of the spackle so that it is level with the surrounding wall surface. Try to remove any excess spackle.
- Let the Spackle Dry: Let the spackle dry completely. This may take several hours or even overnight, depending on the type of spackle and the temperature and humidity of the room.
- Sanding: After the spackle is completely dry, use medium-grit sandpaper to smooth the surface. Then use fine-grit sandpaper for a smooth finish. Be careful to avoid sanding the surrounding wall.
- Cleaning: Use a damp sponge or cloth to remove any dust from sanding.
- Apply Primer (Optional): If you wish, you can apply a coat of primer to the repaired area. This will help to even out the color and improve paint adhesion.
- Painting: After the primer (if used) is dry, paint the repaired area with paint that matches the wall color. You may need to apply two coats of paint for full coverage.
Chapter 4: Tips for Achieving a Professional Result
- Use High-Quality Spackle: This will lead to better and more durable results.
- Don't Apply Too Much Spackle at Once: It's better to apply several thin layers of spackle than one thick layer.
- Be Patient: Let the spackle dry completely before sanding and painting.
- Use Fine-Grit Sandpaper: This will help avoid scratching the surrounding wall.
- Clean Tools After Use: This will help extend their lifespan.
- Test the Paint: Before painting the repaired area, test the paint on an inconspicuous area to make sure it matches the wall color.
Chapter 5: Repairing Larger Holes (More than 1/2 inch)
If the hole is larger than 1/2 inch, you may need to use a different technique. One common method is to use a drywall patch.
- Clean the Area: As with small holes, clean the area around the hole.
- Apply Drywall Patch: Remove the backing from the drywall patch and place it over the hole. Press it firmly onto the wall.
- Apply Spackle: Using a putty knife, apply a thin layer of spackle over the drywall patch. Make sure to cover the entire patch.
- Let the Spackle Dry: Let the spackle dry completely.
- Sanding: After the spackle is dry, sand the surface to smooth it.
- Apply a Second Coat of Spackle (If Necessary): If there are any uneven areas, apply a second coat of spackle and let it dry.
- Final Sanding: Sand the surface again for a smooth finish.
- Cleaning and Painting: Clean the area and paint it as described above.
Chapter 6: Dealing with Moisture Damage
If the hole is in a damp area, such as a bathroom or kitchen, it's important to address the source of the moisture before repairing the hole. You may need to fix a leaky pipe or improve ventilation in the room.
- Fix the Source of Moisture: Repair any leaks or ventilation problems.
- Dry the Area: Make sure the area around the hole is completely dry before starting the repair.
- Use Moisture-Resistant Spackle: Use a drywall joint compound specifically designed for use in damp areas.
- Follow the Regular Repair Steps: Follow the steps outlined above to repair the hole.
Chapter 7: Prevention is Better Than Cure
The best way to deal with holes in drywall is to prevent them from happening in the first place. Here are some tips:
- Be Careful When Moving Furniture: Avoid bumping furniture into walls.
- Use Doorknob Protectors: Doorknob protectors can help prevent doorknobs from making holes in walls.
- Hang Pictures and Paintings Properly: Use hanging hardware that is appropriate for the weight and size.
- Be Careful When Using Nails and Screws: Avoid driving nails and screws in too deeply.
Chapter 8: Alternatives to Spackle
If you don't have spackle on hand, you can use some temporary alternatives to repair very small holes:
- White Toothpaste: Can be used to fill very small holes caused by nails or tacks.
- White Soap: Can be used in the same way as toothpaste.
- Wet White Bread: Can be used to fill small holes, but it's not a permanent solution.
Important Note: These alternatives are temporary solutions only. It's best to use spackle for a permanent repair.
Conclusion: A Successful Repair... A Beautiful Wall!
Repairing a small hole in drywall is a simple and rewarding project that anyone can do. By following the steps and tips outlined in this article, you can quickly and easily repair holes and keep your walls in top condition. Remember that prevention is better than cure, so be careful to avoid creating holes in the first place. With a little effort, you can enjoy a beautiful and flawless home.