Introduction: The Annoying Leak and How to Overcome It
A leaky faucet, despite its simplicity, can be very annoying, not only because of the constant sound it makes, but also because of the continuous waste of water, leading to an increased water bill. Fortunately, in most cases, these simple leaks can be easily repaired without the need to call a specialist plumber. This article is a comprehensive step-by-step guide to help you diagnose and fix the problem yourself, saving you money and time.
Chapter 1: Identifying the Type of Leak
Before starting any repair process, it is essential to identify the type of leak and its source. There are several common types of faucet leaks, each with different solutions:
- Leak from the Faucet Spout: This is the most common type, usually caused by damage to the washers or internal valves.
- Leak from the Base of the Faucet: This may indicate a problem with the O-ring or pipe connections.
- Leak from the Handle: Often caused by damage to the gaskets or valves inside the handle.
Carefully inspect the faucet to determine the exact source of the leak. This will help you determine the tools and materials needed for repair.
Chapter 2: Tools and Materials Needed
Before you begin, make sure you have the following tools and materials:
- Adjustable Wrench: For loosening and tightening nuts and connections.
- Screwdrivers: A variety of flathead and Phillips head screwdrivers.
- Pliers: For gripping and removing small parts.
- Replacement Washers: Make sure to buy the correct washers for the type and size of your faucet.
- O-rings: You may need to replace them if the leak is from the base of the faucet or the handle.
- Teflon Tape: Used to seal pipe connections and prevent leakage.
- Cloth or Towel: To clean the area and absorb any spilled water.
- Bucket: To place under the faucet to collect any remaining water.
- Flashlight: To illuminate dark areas under the sink.
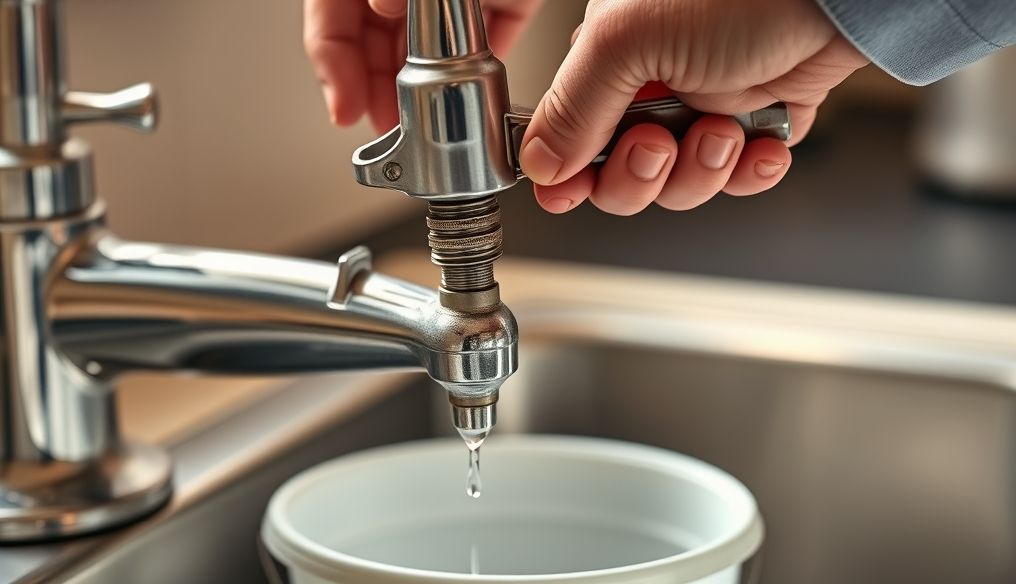
Chapter 3: Steps to Repair a Leak from the Faucet Spout
If the leak is from the faucet spout, follow these steps:
- Turn Off the Water Supply: Turn off the hot and cold water valves located under the sink. If you cannot find them, you can turn off the main water supply to the house.
- Relieve the Pressure: Open the faucet to relieve any remaining pressure in the pipes.
- Disassemble the Faucet: Look for the set screw usually located on the top or back of the faucet. Use the appropriate screwdriver to loosen the screw.
- Remove the Handle: After loosening the set screw, gently remove the handle. You may need to use pliers if the handle is stuck.
- Unscrew the Cover: Under the handle, you will find a cover. Unscrew this cover using an adjustable wrench.
- Inspect the Washers: After unscrewing the cover, you will find the washers and internal valves. Inspect them carefully for any damage or wear.
- Replace Damaged Washers: If you find damaged washers, replace them with new washers of the same type and size.
- Reassemble the Faucet: After replacing the washers, reassemble the faucet in the same order you disassembled it.
- Turn On the Water Supply: Slowly open the hot and cold water valves and check for leaks.
Chapter 4: Repairing a Leak from the Base of the Faucet
If the leak is from the base of the faucet, follow these steps:
- Turn Off the Water Supply: As in the previous step, turn off the hot and cold water valves.
- Detach the Faucet from the Sink: Using an adjustable wrench, loosen the nuts that hold the faucet to the sink from below.
- Inspect the O-ring: After detaching the faucet, inspect the O-ring located around the base of the faucet.
- Replace the Damaged O-ring: If the O-ring is cracked or worn, replace it with a new one of the same size.
- Clean the Base of the Faucet: Before reassembling the faucet, clean the base of the faucet and the sink thoroughly.
- Reassemble the Faucet: Place the new O-ring around the base of the faucet and reassemble it into the sink. Tighten the nuts securely using an adjustable wrench.
- Turn On the Water Supply: Turn on the water valves and check for leaks.
Chapter 5: Addressing a Leak from the Handle
If the leak is from the handle, the cause may be damage to the gaskets or valves inside the handle itself. Follow these steps:
- Turn Off the Water Supply: Turn off the hot and cold water valves.
- Detach the Handle: Look for the set screw on the handle and loosen it using the appropriate screwdriver.
- Remove the Handle: After loosening the screw, gently remove the handle.
- Unscrew the Cover: Under the handle, you will find a cover. Unscrew this cover using an adjustable wrench.
- Inspect the Washers and Valves: After unscrewing the cover, you will find the washers and internal valves. Inspect them carefully for any damage or wear.
- Replace Damaged Washers and Valves: If you find damaged washers or valves, replace them with new parts of the same type and size.
- Reassemble the Handle: After replacing the damaged parts, reassemble the handle in the same order you disassembled it.
- Turn On the Water Supply: Turn on the water valves and check for leaks.
Chapter 6: Using Teflon Tape to Seal Connections
Teflon tape is a sealant used to seal pipe connections. If you are having difficulty preventing leakage even after replacing washers and O-rings, you can use Teflon tape. Follow these steps:
- Detach the Connection: Loosen the connection you think is causing the leak.
- Clean the Connection: Clean the connection thoroughly to remove any dirt or debris.
- Wrap Teflon Tape: Wrap Teflon tape around the male threads of the connection clockwise. Make sure to cover all the threads with tape.
- Re-tighten the Connection: Re-tighten the connection securely.
- Turn On the Water Supply: Turn on the water valves and check for leaks.
Chapter 7: Tips for Maintaining Your Faucet and Preventing Leaks
To maintain your faucet and prevent leaks in the future, follow these tips:
- Regular Inspection: Inspect your faucet regularly for any signs of damage or wear.
- Immediate Replacement: Replace any damaged washers or O-rings immediately.
- Handle Gently: Avoid using excessive force when opening or closing the faucet.
- Regular Cleaning: Clean the faucet regularly to remove any deposits or dirt.
- Use Original Spare Parts: When replacing any parts, use original or high-quality spare parts.
Chapter 8: When to Call a Professional Plumber?
In some cases, repairing a leaky faucet can be very complicated and require the expertise of a professional plumber. Call a plumber if:
- You are unsure how to repair the leak.
- You have tried all the solutions mentioned above and they have not worked.
- The leak is large or has caused significant damage.
- You have an old or complex faucet.
Conclusion
Fixing a simple leaky faucet is not difficult, and you can do it yourself by following the steps mentioned in this article. Always remember to turn off the water supply before starting any repair process, and use the appropriate tools and materials. If you are unsure of anything, do not hesitate to consult a professional plumber. Fixing the leak yourself saves you money and conserves precious water.