What is the Correct Way to Use an Electric Drill Safely and Effectively?
The electric drill is a versatile tool indispensable in any home or workshop. Whether you're hanging a picture, assembling a piece of furniture, or even undertaking a larger construction project, knowing how to use a drill correctly and safely is essential. This article provides a comprehensive guide on how to use a drill effectively, focusing on safety and precision.
Chapter 1: Types of Electric Drills and How to Choose the Right One
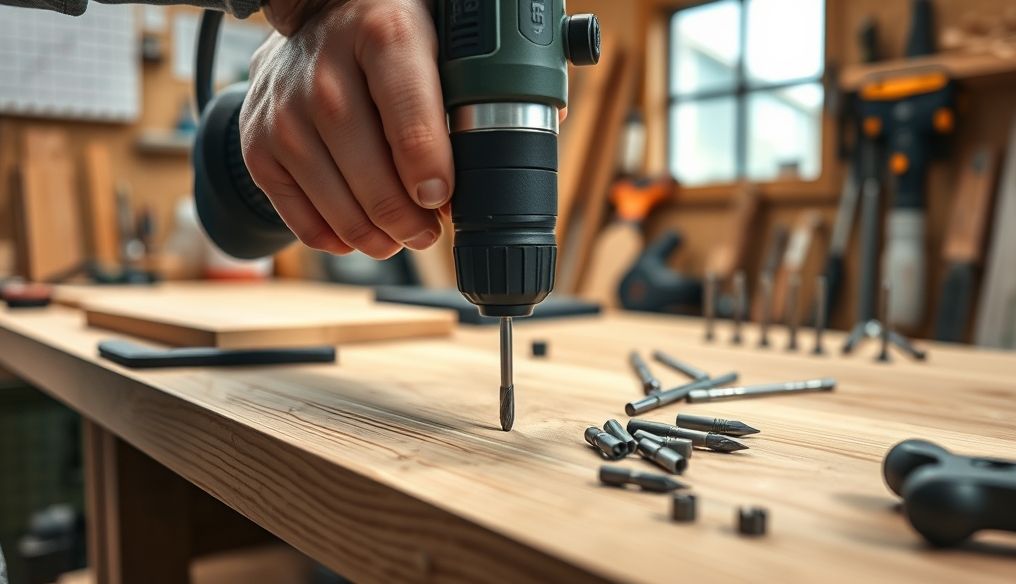
There are different types of electric drills, and each type has its own uses. It is important to choose the right type for the task you are doing.
Types of Electric Drills:
- Cordless Drill: Operates on battery power, making it easy to use in places where power sources are not available. Ideal for light to medium tasks.
- Corded Drill: Relies on direct electricity, providing more power and longer operating life. Suitable for heavy tasks and prolonged use.
- Hammer Drill: Combines rotation and hammering, making it ideal for drilling into concrete and brick.
- Rotary Hammer: More powerful than a hammer drill, and specifically designed for drilling into hard materials such as reinforced concrete.
- Angle Drill: Designed for drilling in tight, hard-to-reach places.
How to Choose the Right Drill:
- Type of Task: Determine the type of materials you will be drilling into (wood, metal, concrete).
- Level of Use: If you will be using the drill frequently, choose a strong corded model. If the use is intermittent, a cordless drill may be sufficient.
- Budget: Drill prices vary widely. Set your budget and look for the best options available within it.
Chapter 2: Basic Safety Equipment and How to Use It
Safety is the top priority when using any power tool. Make sure you wear appropriate safety equipment before starting work.
Basic Safety Equipment:
- Safety Glasses: To protect your eyes from dust and flying debris.
- Work Gloves: To protect your hands and improve your grip on the drill.
- Ear Protection: To protect your hearing from loud noise, especially when using a hammer drill.
- Dust Mask: To protect your lungs from dust and small particles, especially when drilling into concrete or wood.
Safety Tips:
- Read the user manual for the drill carefully before use.
- Make sure the work area is well lit and free of obstacles.
- Do not wear loose clothing or jewelry that may get caught in the drill.
- Disconnect the drill from the power source before changing bits or performing any maintenance.
- Do not force the drill to work. Let it do the job at a natural pace.
Chapter 3: How to Install a Drill Bit Correctly
Installing the drill bit correctly ensures drilling accuracy and prevents damage to the drill.
Steps to Install a Drill Bit:
- Disconnect the drill from the power source.
- Open the drill chuck: Use the chuck key to open the hole in the front of the drill.
- Insert the drill bit: Make sure to insert the bit completely into the chuck.
- Tighten the chuck: Use the chuck key to tighten the chuck on the bit. Make sure it is tight enough to prevent the bit from slipping during drilling.
- Test the bit: Run the drill briefly to make sure the bit is properly installed and does not vibrate.
Types of Drill Bits:
- Wood Drill Bits: Specifically designed for drilling into wood, and feature a pointed head to identify the starting point.
- Metal Drill Bits: Made of high-speed steel (HSS) and designed for drilling into metals.
- Concrete Drill Bits: Made of tungsten carbide and designed to withstand the heat and friction caused by drilling into concrete.
- Multi-Purpose Drill Bits: Can be used to drill into a variety of materials, but are not ideal for any particular material.
Chapter 4: Basic Drilling Techniques: Wood, Metal, and Concrete
Drilling techniques vary depending on the materials. Here are some basic tips for drilling into wood, metal, and concrete.
Drilling into Wood:
- Use a wood drill bit: Choose a bit with a pointed head to identify the starting point.
- Use a low speed: Start at a low speed and gradually increase it.
- Apply gentle pressure: Do not press hard on the drill. Let it do the job.
- Avoid splintering: Place a piece of scrap wood behind the piece you are drilling to prevent splintering.
Drilling into Metal:
- Use a metal drill bit: Choose a bit made of high-speed steel (HSS).
- Use lubricating oil: Place a few drops of lubricating oil on the drilling point to reduce friction and heat.
- Use a low speed: Start at a low speed and gradually increase it.
- Apply steady pressure: Apply steady pressure to the drill.
- Cool the bit: If the bit starts to heat up, stop and cool it in water.
Drilling into Concrete:
- Use a hammer or rotary drill: These types of drills are designed for drilling into solid materials.
- Use a concrete drill bit: Choose a bit made of tungsten carbide.
- Use safety glasses and a dust mask: Drilling into concrete produces a lot of dust.
- Apply strong pressure: Apply strong pressure to the drill.
- Use the hammering action: Allow the hammer or rotary drill to do its job.
Chapter 5: Adjusting and Controlling the Drill Speed
Controlling the drill speed is essential to achieve accurate results and avoid damaging materials.
How to Adjust the Drill Speed:
- Look for the speed control switch: This switch is usually located on or near the trigger.
- Start at a low speed: Start at a low speed and gradually increase it as needed.
- Use the appropriate speed for the material: Wood requires a low speed, while metals require a higher speed.
- Use the appropriate speed for the bit size: Large bits require a low speed, while small bits require a higher speed.
Tips for Controlling the Drill:
- Use both hands: Use one hand to hold the drill and another to guide it.
- Stand firmly: Maintain your balance while drilling.
- Do not press hard: Let it do the job.
- Expect kickback: Be prepared for the drill to kick back, especially when drilling into metals.
Chapter 6: Tips for Accurately Marking the Drilling Point
Accurately marking the drilling point ensures that you get holes in the desired location.
Methods for Marking the Drilling Point:
- Use a pencil: Place a clear mark on the drilling point using a pencil.
- Use a Center Punch: Use a center punch to create a small indentation at the drilling point. This helps prevent the bit from slipping.
- Use masking tape: Place a piece of masking tape on the drilling point. This helps prevent splintering.
Additional Tips:
- Use a level: If you need to drill a straight hole, use a level to make sure the drill is straight.
- Use a drill guide: A drill guide can be used to help guide the drill and keep it straight.
Chapter 7: Drill Maintenance to Keep It in Good Condition
Regular drill maintenance extends its life and keeps it in good working order.
Drill Maintenance Tips:
- Clean the drill after each use: Wipe the drill with a clean cloth to remove dust and debris.
- Inspect the power cord: Make sure the power cord is not damaged.
- Lubricate the drill chuck: Lubricate the drill chuck regularly to keep it working smoothly.
- Replace worn bits: Replace worn bits with new ones to maintain drilling accuracy.
- Store the drill in a dry place: Store the drill in a dry place to protect it from rust.
Chapter 8: Troubleshooting Common Problems in Using the Drill
You may encounter some common problems when using the drill. Here are some possible solutions.
Common Problems and Solutions:
- The bit slips: Make sure the bit is securely fastened in the chuck. You may also need to use a center punch to create a small indentation at the drilling point.
- The drill overheats: Stop and cool the drill. You may also need to use lubricating oil to reduce friction.
- The drill kicks back: Be prepared for the drill to kick back. You may also need to use both hands to hold the drill.
- The hole is not straight: Use a level to make sure the drill is straight. You may also need to use a drill guide.
By using these tips and techniques, you can use the electric drill safely and effectively to accomplish a variety of home and workshop projects.
