Introduction: The Power of Simple Editing
In the age of digital photography, photo editing has become an essential skill. Fortunately, you don't need to be a professional or use complicated software to improve your photos. There are many simple and free programs that can make a significant difference.
Chapter 1: Why is Photo Editing Important?
Photo editing isn't about changing reality, but about enhancing it. Here are some reasons why photo editing is important:
- Improving Lighting and Contrast: Can make the image clearer and more appealing.
- Removing Blemishes: Can remove small spots or imperfections that may distract.
- Adjusting Colors: Can change colors to make the image more vibrant or to create a certain mood.
- Focusing on the Subject: Editing can be used to direct the viewer's attention to the most important part of the image.
Chapter 2: Simple and Accessible Photo Editing Programs
There are many options available, whether you're using a computer or a smartphone. Here are some of the most popular and easy-to-use programs:
Computer Programs:
- GIMP: A free and open-source program that offers a wide range of tools.
- Paint.NET: A simple and easy-to-use program, but it offers powerful editing options.
- Fotor: A free program with an easy-to-use user interface and a variety of filters and effects.
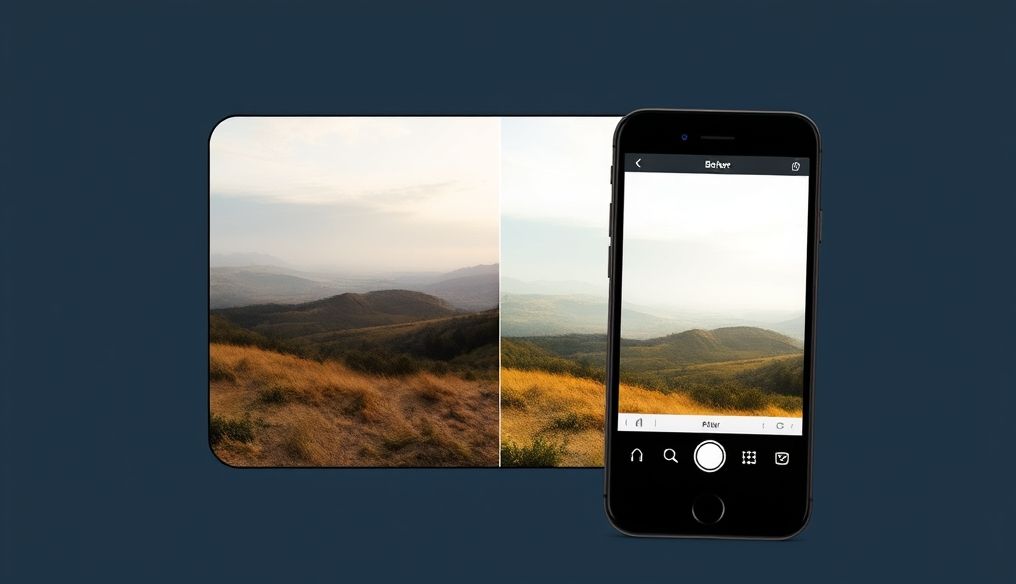
Smartphone Apps:
- Snapseed: A free app from Google that offers a large selection of professional tools.
- Adobe Lightroom Mobile: A free app (with paid options) that provides powerful editing tools and synchronization with Adobe Creative Cloud.
- PicsArt: A free app that offers a wide range of creative tools, including filters and stickers.
Chapter 3: Photo Editing Basics: Lighting and Contrast
Lighting and contrast are among the most important elements that determine the quality of the image. Here's how to adjust them:
- Lighting: Increase the brightness if the image is too dark, and decrease it if it is too bright.
- Contrast: Increase the contrast to make the colors more vivid, and decrease it to make the image softer.
Tip: Start with small adjustments, then gradually increase or decrease the values until you get the desired result.
Chapter 4: Adjusting Colors: Vibrance and Saturation
Adjusting colors can greatly change the mood of the image. Here's how to adjust vibrance and saturation:
- Vibrance: Vibrance increases the less saturated colors, making the image look more natural.
- Saturation: Saturation increases all colors, which can make the image look unrealistic if used excessively.
Example: If you have a landscape photo, you can increase the vibrance to make the colors more vivid without making them look exaggerated.
Chapter 5: Cropping and Rotating: Improving Composition
Cropping and rotating can improve the overall composition of the image. Here's how to use them:
- Cropping: Use cropping to remove distracting elements or to change the aspect ratio of the image.
- Rotating: Use rotation to correct a tilted horizon or to change the viewing angle.
Rule of Thirds: Try applying the rule of thirds when cropping, where the image is divided into nine equal sections, and important elements are placed on the lines or at the intersection points.
Chapter 6: Removing Blemishes: Retouching and Correction
Small imperfections, such as spots or blemishes, can be removed using retouching and correction tools. Here are some common tools:
- Spot Healing Brush: Removes small spots by replacing them with pixels from the surrounding area.
- Clone Stamp Tool: Copies pixels from one area to another.
Tip: Use these tools with caution, and try to make the adjustments unnoticeable.
Chapter 7: Adding Filters and Effects
Filters and effects can add an artistic touch to your photos. However, they should be used with caution to avoid making the image look artificial.
- Filters: Filters can be used to change colors or add special effects, such as an old photo effect or a black and white effect.
- Effects: Effects can be used to add additional elements to the image, such as frames or text.
Tip: Try a variety of filters and effects, but choose those that match the subject of the image and enhance it.
Chapter 8: Saving and Sharing Edited Photos
After you've finished editing the photo, it's important to save it in a suitable format and share it with others. Here are some tips:
- File Format: Save photos in JPEG format if you want to share them online, and in PNG format if you want to maintain high quality.
- File Size: Reduce the file size if you want to upload the image quickly or send it via email.
- Sharing: Share photos on social media or on photo sharing sites, such as Instagram or Flickr.
Conclusion: Creating with Simple Editing
Photo editing doesn't have to be complicated. Using simple programs and basic tools, you can transform your ordinary photos into attractive and professional-looking images. Remember that practice is key, so don't hesitate to experiment with different tools and techniques until you find what works for you.